Lighting: Light Around the Picture
Stop ceiling glare and window light spill from washing out shadow detail. Combine shielded joinery coves, calibrated bias lighting, and matte wall finishes.
The Small-Room Light Spill Trap
In a large dedicated theatre, the side walls and ceiling sit metres away from the screen. In a compact living room, your screen edges may sit only 350 mm from an adjacent pale wall or white ceiling. When a bright HDR highlight flashes on screen, light bounces off those nearby surfaces and reflects straight back onto the screen canvas—destroying contrast ratios even on expensive projectors and displays.
At the same time, watching an OLED or mini-LED television in pitch darkness forces your pupils to constrict and dilate constantly, causing dry eyes and headaches within forty minutes. The solution is controlled, shielded indirect lighting paired with low-sheen architectural surfaces around the front third of the room.
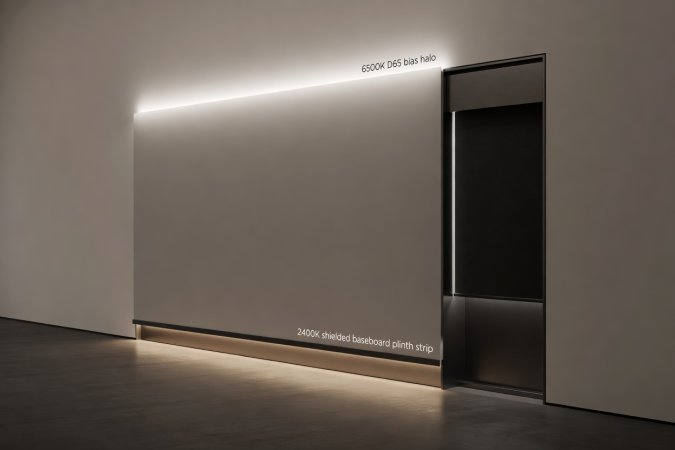
Three-Layer Lighting Plan: Zone 1 provides 6500K D65 reference bias behind direct-view displays; Zone 2 tucks 2400K warm amber strips under credenza toe-kicks; Zone 3 seals window perimeters inside U-channel timber pelmets.
Key Photometric Targets
-
01
6500K CIE D65 Bias Reference (OLED / LED TV)
Set rear display bias strips to 10% of the screen's peak white luminance with a CRI ≥ 95 so your eye has a stable white point and black bars appear ink-black.
-
02
Zero Direct-Line-of-Sight Diode Rule
Never leave bare LED tape visible from any seated position. Recess cob-LED tape inside 14 mm deep anodised aluminium extrusions fitted with frosted opal diffusers and a 20 mm timber lip.
-
03
< 2% Specular Gloss on Front Wall
Paint the screen wall and the first 900 mm of side walls in dead-flat matte warm charcoal or wrap them in matte acoustic fabric to stop screen bounce.
Projector Screens vs. Direct-View Displays
Your lighting strategy must change depending on whether your image is emitted (OLED/Mini-LED TV) or reflected (front projector screen).
-
L1
Direct-View TVs Thrive on Rear Bias Light
Because an OLED panel generates its own light, a soft 6500K halo on the wall behind the TV improves perceived shadow contrast without washing out the glass panel.
-
L2
Projectors Demand Zero Light on the Screen Wall
A projector cannot project black; "black" is simply the unlit screen surface. For projectors, keep the front wall completely unlit during the film and place low-level 2200K–2400K orientation strips under the sofa plinth or rear bookcase kickboard, shielded away from the screen.
-
L3
Directional ALR Lenticular Screens
Pair ultra-short-throw projectors with a sawtooth lenticular Ambient Light Rejecting (ALR) screen that accepts light only from below and rejects 85% of ceiling bounce light.
Window Blackout Joinery for Daytime Viewing
Standard roller blinds leave a 20 mm gap along both vertical edges, turning windows into glowing light frames during afternoon screenings. You can eliminate window bleed cleanly without boarding up the glass.
-
W1
Brush-Lined Side U-Channels
Fit 30 mm timber or matte-anodised aluminium U-channels along the inside reveal of the window frame. The blackout roller fabric rides inside brush pile seals, blocking 99% of side light bleed.
-
W2
Top Box Pelmet With Acoustic Lining
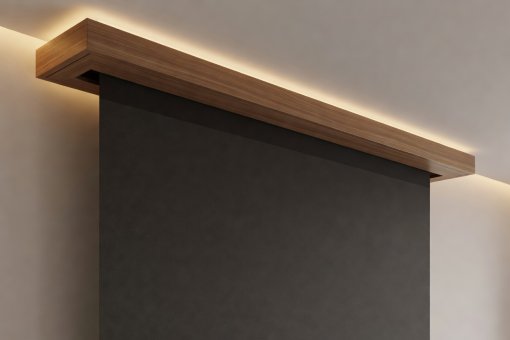
Cap the top of the window curtain track or roller blind with a 120 mm deep timber pelmet box lined on the underside with black felt to stop upward light chimneys against the ceiling.
-
W3
Three-Scene Wall Switch Presets
Program one physical rotary dimmer by the door with three fixed scenes: Daylight Living (100% warm ceiling + joinery), Intermission (30% shelf & plinth glow), and Feature Presentation (10% bias or rear toe-kick only).
Cinema Joinery Lighting Specification Table
| Lighting Zone | Colour Temp (CCT) | Target Output / Dimming | Mounting Detail | Compatible Display Type |
|---|---|---|---|---|
| Rear Screen Bias Strip | 6500K (CIE D65, CRI 95+) | Dimmed to 10% of peak screen nits | 4-sided perimeter on rear of TV | OLED, QLED & Mini-LED TVs only |
| Credenza & Sofa Plinth Glow | 2200K – 2400K Warm Amber | 15 – 30 lumens/metre (5% dim) | Recessed 40 mm under toe-kick | Projectors & Direct-View TVs |
| Bookcase & Acoustic Cove | 2700K Soft Warm White | 180 lumens/metre (Intermission) | Behind 22 mm timber pelmet lip | Pre-show & daily room use |
| Equipment Rack Service Light | 3000K Neutral Warm | Door-switch triggered only | Inside rear cable spine cavity | Maintenance & port swapping |